
Screen Divider Explained
Screen
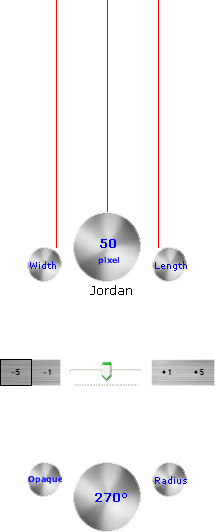
Divider - Control the Divider

-
 can be dragged up or down to modify the
width of the Screen Divider arms
-  can be dragged up or down to modify the length
of the Screen Divider arms
-  can be dragged up or down to modify the radius
of the Screen Divider. The radius represents the distance between the two big
circles of the Screen Divider
-  can be dragged up or down to modify the Screen
Divider opacity.
-  is used to modify the distance between any
two arms of the Screen Divider
Screen Divider -
Context Menu
-
right click anywhere on the Screen Divider and the associated context menu will
appear
-
the "Units" menu option changes the Unit of measurement for the Screen
Divider
-
the "Divider Mode" menu option changes the way the arms are displayed
-
the "Copy Distance" menu option copies into the Clipboard the distance between
any two divider arms
-
the "Copy Angle" menu option copies into the Clipboard the angle of the Screen
Divider
-
the "Copy Line Length" menu option copies into the Clipboard the arm
length of the Screen Divider
-
the "Results Container" menu option shows a window in which the Cobb angle
measurement could be shown (the Cobb angle measurement will be shown only if you
enable it)
- the "Show Cobb Angle" menu option enables
the measurement of the "Cobb" angle
- the "Show Line Length" menu option shows
the arm length of the Screen Divider (it is shown near the right bottom of the
"Length" control)
- the "Show Easy View" menu option shows the
middle arm of the Screen Divider right over the big circle which shows the
distance measurement and also makes transparent the center point of this circle.
This is especially usefull when you want to position the Screen Divider on a
fixed point.
- the "Show Control Panel" menu option shows
the "Control Panel" window which allows you to start new Screen Dividers and
access application settings.
- the "Skins" menu option allows you to
change the way the Screen Divider looks
- the "Line Color" menu option allows you to
change the color of the Screen Divider arms
- the "Add New" menu option has sub menu
options allowing you to:
- add a new arm to
the Screen Divider
- add a new
Screen Divider to the scene
- the
"Remove" menu option allows you to remove one arm from the Screen
Divider
- the
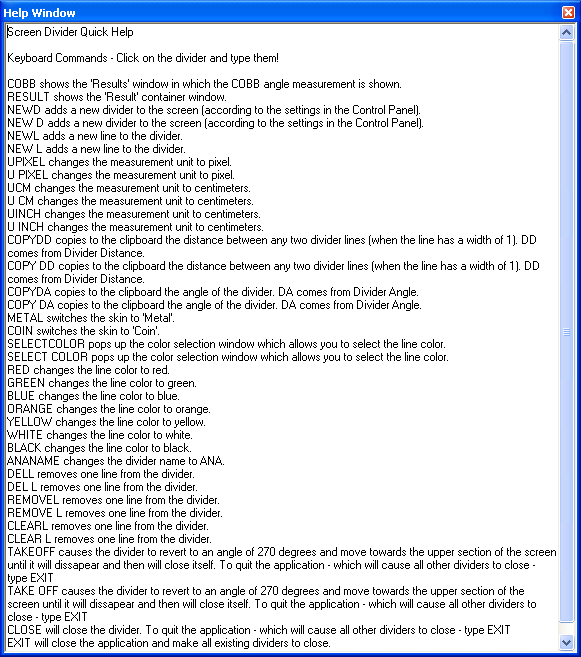
"Help Window" menu option shows (if it is hidden) or hides (if it is visible) a
window in which you can see instructions which the Screen Divider understands.
Typing these instructions and hitting Enter allows you to control the Screen
Divider using your keyboard.
- the
"Take Off" menu option sets the Screen Divider angle to 270 degrees and moves it
toward the top of the screen. Once it has dissapeared the Screen Divider
will no longer be accessible but you can start a new one (or new ones)
using the Control Panel window.
- the
"Close Divider" menu option removes the Screen Divider from the scene but you
can start a new one (or new ones) using the Control Panel window.
- the
"Exit" menu option closes the Screen Divider application. All visible Screen
Dividers will be closed. If you want to add a Screen Divider to the scene after
clicking this menu option you will have to start the Screen Divider application
again.
Screen Divider - Cobb
Angle
-
to measure the Cobb Angle you need to have 2 Screen Dividers visible on screen
-
align any arm of one divider with one vertebra and align any arm of the other
divider with the other vertebra
-
right click any of the Screen Dividers (anywhere you want) and select "Show Cobb
Angle". This will show the Results window and after you click again on any
of the two Dividers you'll see the Cobb angle measurement inside the Results
window.
-
you can also read the Cobb angle by calculating how many degrees are between the
two dividers.
Screen Divider -
Control Panel
- the "Show Control Panel" menu option shows
the "Control Panel" window which allows you to start new Screen Dividers and
access application settings.
- the "Divider Name" field contains a name
which will be assigned to a Screen Divider when you press the "Start New
Divider" menu option. You can enter any name here as long as it is not taken by
an existing Screen Divider or you may click the refresh button right next to
this field to randomly choose a name for this field.
- the "Unit" field allows you to specify the
unit of measurement for new Screen Dividers
- the "Line Count" field allows to specify
how many arms do new Screen Dividers have
- the "Line Length" field allows to specify
the length of the Screen Divider arms.
- the "Divider Skin" field allows to specify
the skin for new Screen Dividers
- the "Color" allows to specify the color for
the Screen Divider arms
- the "Distance" field allows to specify the
distance betwee then Screen Divider arms
Once you've defined
the settings for the new Screen Divider, press the "Start New Divider" button to
add a new Screen Divider to the scene.
Screen Divider - Help
Window

-
contains the instructions used to control the Screen Divider. Simply click the
Divider anywhere you like and type any of these instructions to perform
the associated functionality.
Screen Divider -
Request Features

-
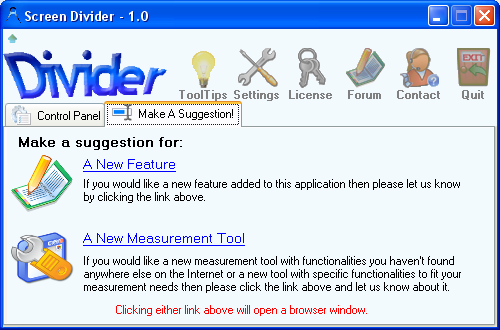
you can request new Screen Divider features by clicking the blue link called "A
New Feature"
-
you can request new measurement tools by clicking the blue link called "A New
Measurement Tool"
Screen
Divider - Application Settings
- the way the Screen
Divider application is started can be controlled using the "Start on System
Startup" check box. If this is not checked then Screen Divider will not start
automatically at System Startup. If it is checked then you can start Screen
Divider:
- Minimized - this will
put Screen Divider in the system tray
- Maximized - this will
show Screen Divider on the screen (minimizing it will send the application to
Windows Tray)
-
press the "Check For Newer Version Now" button to check if a newer version for
the Screen Divider application is available. If such a new version exist then a
possibility to open the download page for the newer version is given.
Go To Top