
I.
Points On A Canvas Explained - General Overview
You can use the application to measure distances between the clicked points.
In the Complex interface the distances are shown between any two points which belong to the same point group.
You can easily specify to which point group(s) a point belongs to. A point can belong to as many point groups as you want.
In the Simple Interface you need add the point to the 'Simple Interface Measurements' window first and then press the 'Measurements' button.
Besides measuring the distance between points you can also compare lines.
Double click to add as many points as you want!
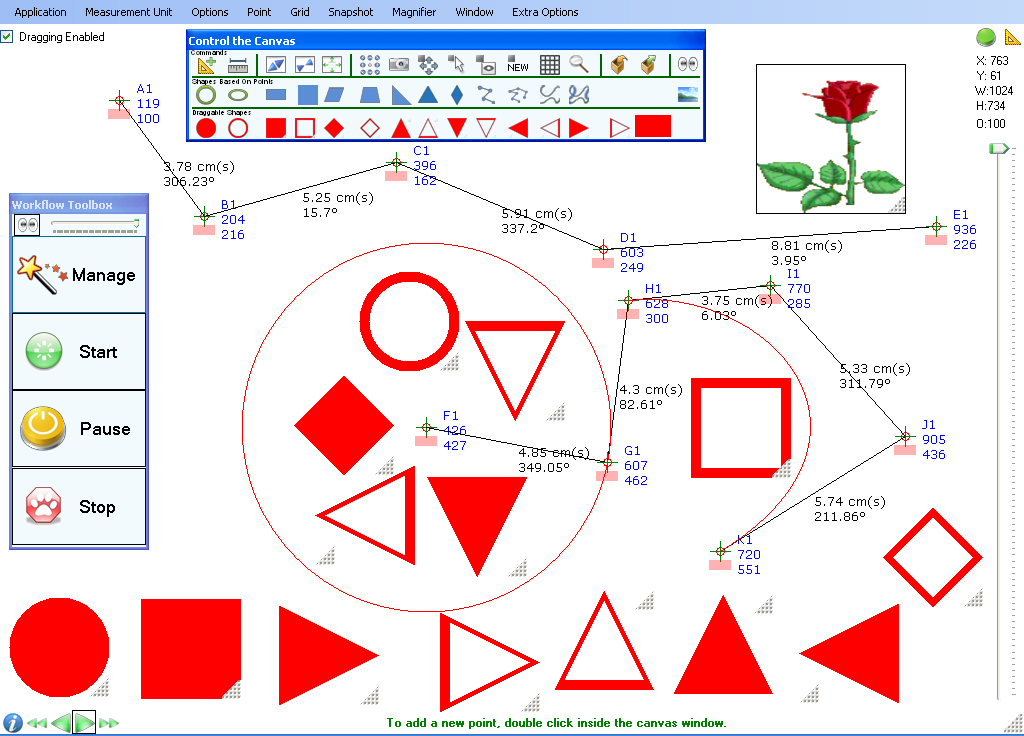
- there is a top menu and a floating command window which you can use to control the canvas. The floating command window can be shown/hidden using the top right green button. The 'Measurements' window - in the Complex Interface can be started using the top right most button (near the green button).
- the scroll bar on the right can be used to set the transparency of the canvas.
- you can easily modify the size of the canvas by dragging it from the bottom right corner.
- the canvas can be dragged around the screen only if the 'Dragging Enabled' check box is checked. The 'Dragging Enabled' check box is at the top left of the canvas.
- at the bottom of the canvas there is the 'Hint's bar which you can use to browse through the existing hints.
a.
Points
- double click the canvas to add a new point. You can add as many points as you want.
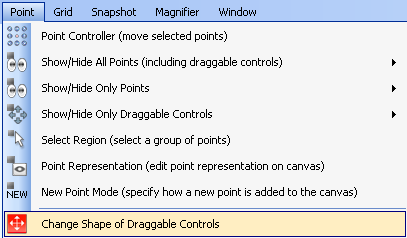
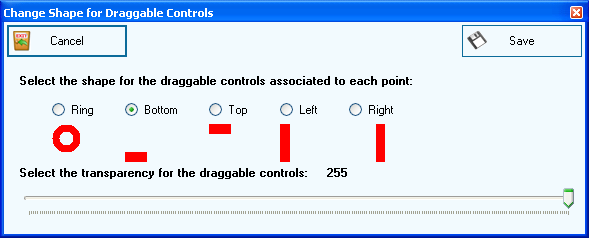
- each point has an associated draggable control which you can use to drag the points around. You can change the position and shape of the draggable controls using the Point -> Change Shape of Draggable Controls menu option.
which will show the following window
- each point has a name and a description which can be shown on the canvas when rendering that point.

- to change the name or description of the point, right click the point and choose 'Edit Point Details (Name, Description)'.

- you can change the point groups for a point using the 'Modify Point Groups' menu option (after right clicking the point). A point groups is actually any string of characters and you can give a point group any name you want to. To add a new point group, enter its name in the 'New Group Name' field and press the 'Add Group' button. Then you can select the newly created group to add it to the existing point collection of point groups.
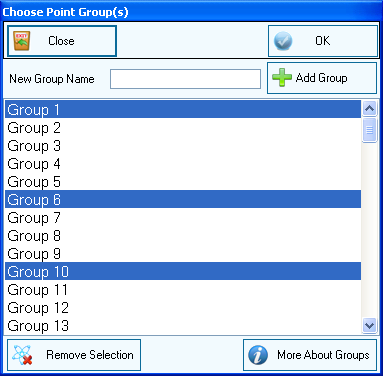
- you can add new point groups or choose any of the existing ones. This window will show (as selected) the existing point groups for the point.
- to remove all point groups from a point, right click the point and choose the 'Clear All Groups for This Point' menu option.
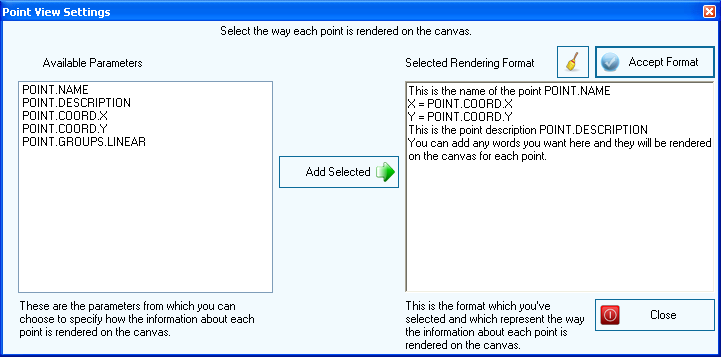
- to change how the point information is rendered on the canvas choose the Point -> Point Representation (edit point representation on canvas) menu option. If you need more parameters to use when the point is rendered, let us know by clicking here!
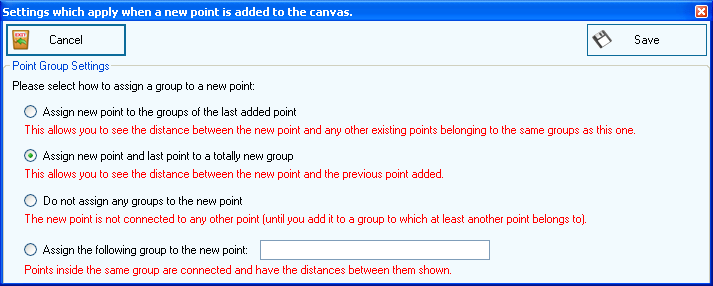
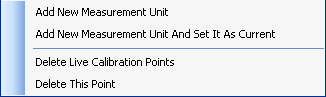
- when adding a new point to the canvas you can specify if a point group is added to that point or if no point group is added, please see image below. The second option should be used when you want to add new points and have the distance between the new point and the previous one automatically shown.
b. Units of Measurement
You can create your own units of measurement manually or using live calibration.
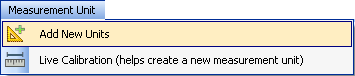
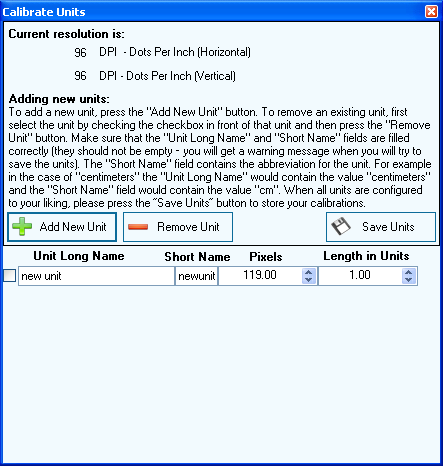
To define a new measurement unit manually, click on the Measurement Unit -> Add New Units menu option.
To add a new measurement unit using live calibration click on the Measurement Unit -> Live Calibration (help create a new measurement unit) menu option.
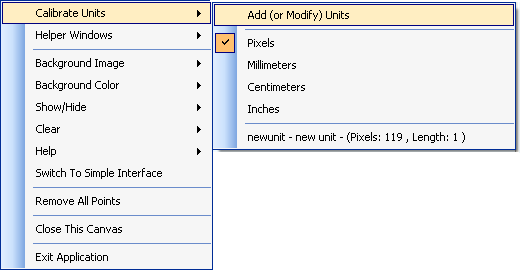
The same window which is shown when clicking the Measurement Unit -> Add New Units menu option
can be shown when the canvas is right clicked and then choosing Calibrate Units -> Add (or Modify) Units.
The window which shows up is the following:
Clicking on the Measurement Unit -> Live Calibration menu option, adds two new points to the canvas
which help create the new measurement unit. All you need to do is select the desired distance between the points and
then right click any of the two points to get the following context menu:
c. Measuring Distances and Comparing Lines
In the Complex Interface, the distance is automatically shown between any two points having at least one point group in common.
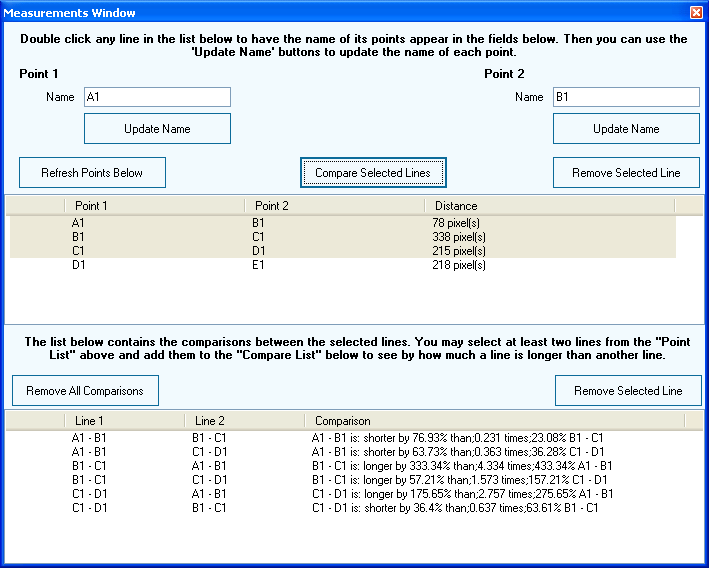
In the Simple Interface, to measure the distance between any two points you would have
to specify that you want to add all points to the 'Simple Interface Measurements' window and then press the
'Measurements' button to have the 'Measurements Window' show up.

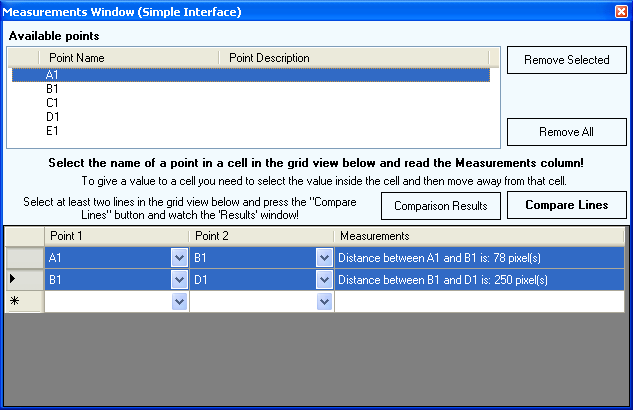
In this window there is a grid at the bottom in which
you can select any of the available points (these are the points you've added to this window using the
'Simple Interface Measurements' menu option). You can add individual points to the 'Measurements' window', just
right click the point and choose the 'Add This Point To 'Simple Interface Measurements' Window'.
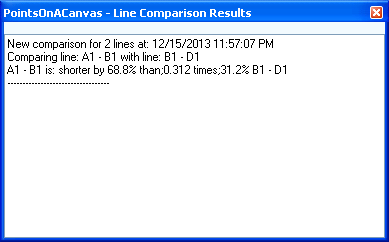
If you have at least two entries in the grid then you can select them and press the 'Compare Lines'
button to show the results of the line comparison.
In the Complex Interface you can press the top right most button to reach the 'Measurements Window'
which you can use to compare the lines between any two connected points. Two points are considered connected if they have at least
one point group in common. In other words, all visible lines on the canvas are available to be compared in this window. All you have to do
is specify which lines you want to compare.
d. Workflows
A workflow is a sequence of steps which tell you where you need to double click next to add a new point.
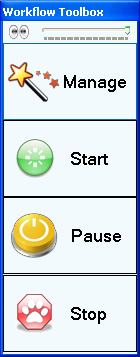
In the Complex Interface, you can define your own workflows using the 'Manage' button.
Once you have at least 1 workflow defined you can start it by pressing the 'Start' button on the Workflow toolbox and selecting it
from the window containing the workflows. You can pause the workflow by pressing the 'Pause' button or you can stop it by pressing
the 'Stop' button both on the Workflow toolbox.
Go To Top